
Make sure to put out cookies and milk for Santa on this beautiful Milk and Cookies for Santa Set created using a Cricut. A white plate displays the words, cookies for Santa, all in bright red font with a glass milk jug that says, milk for Santa.


This set creates a beautiful whimsical holiday decor piece leading up to Christmas.
This plate and milk jug would make a great gift for neighbors or friends with children.
Children will love having a special plate to put treats on just for Santa.
Since it’s a white plate with festive red font it’s a classic decor piece that will last for years.
In less than an hour, you’ll have a plate and milk jug decorated wtih red vinyl that will bring excitement to anyone who sees it!

HOW TO MAKE A DIY MILK AND COOKIES FOR SANTA SET
A beautiful white plate and milk jug are adorned with red vinyl to make the perfect Milk and Cookies for Santa set the whole family will enjoy!
Are you ready to get started?
You’ll find the specific material amounts and detailed instructions in the printable craft at the bottom of this post.
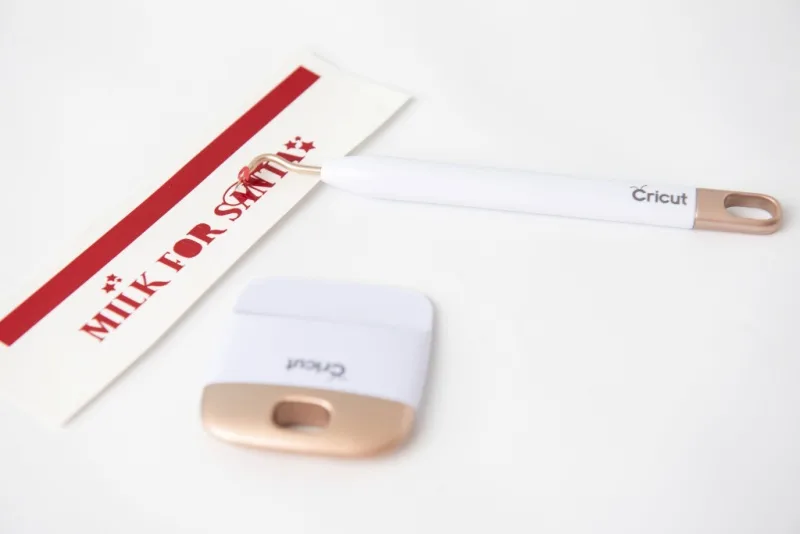
TOOLS YOU MAY NEED
Disclosure: This blog post contains affiliate links for products or services we think you’ll like. This means if you make a purchase from one of these links, Kelly’s Thoughts On Things may make a small commission at no additional cost to you. We only recommend items we use and love.
- Cricut or cutting machine
- Blue or green cutting mat
- Transfer tape
- Weeding tool
- Scrapper tool
MILK AND COOKIES FOR SANTA SET MATERIALS


This beautiful Milk and Cookies for Santa Set uses easy to find materials to create a fun Cricut holiday decor item your family will love.
All you need is:
- Permanent vinyl (red, green, black or color of choice)
- white ceramic plate
- glass milk bottle
- Plate SVG
- Bottle SVG
DIY MILK AND COOKIES PLATE FOR SANTA INSTRUCTIONS

First, upload the SVG’s for the plate and milk bottles in the design space.

If using bigger glassware, adjust for the sizing as normal.


Once sized accordingly, select make it in the design space.

Adjust the machine setting or material dial to a custom, washi sheet with more pressure.
The svgs have small, thin, and delicate cuts as this setting will help it cut smoothly.


Load the permanent vinyl to your machine on the blue light grip mat or green standard grip map and hit “go”.
When the cuts are complete, begin to weed the vinyl off and away from the design using your weeding tool (looks like a dentist’s pick).
Don’t forget to weed around the outside of the letters and small parts inside any letter that are enclosed (ex. a,e,o ).

After the designs are completely weeded, cut off a piece of transfer tape the size of the vinyl layers, and apply the transfer tape using pressure with the scrapper tool.
This is done in order to get the vinyl off its carrier sheet and onto the project’s surface.

Turn the entire design face down and begin to gently apply pressure and pull the vinyl’s carrier sheet off and away from the transfer tape.
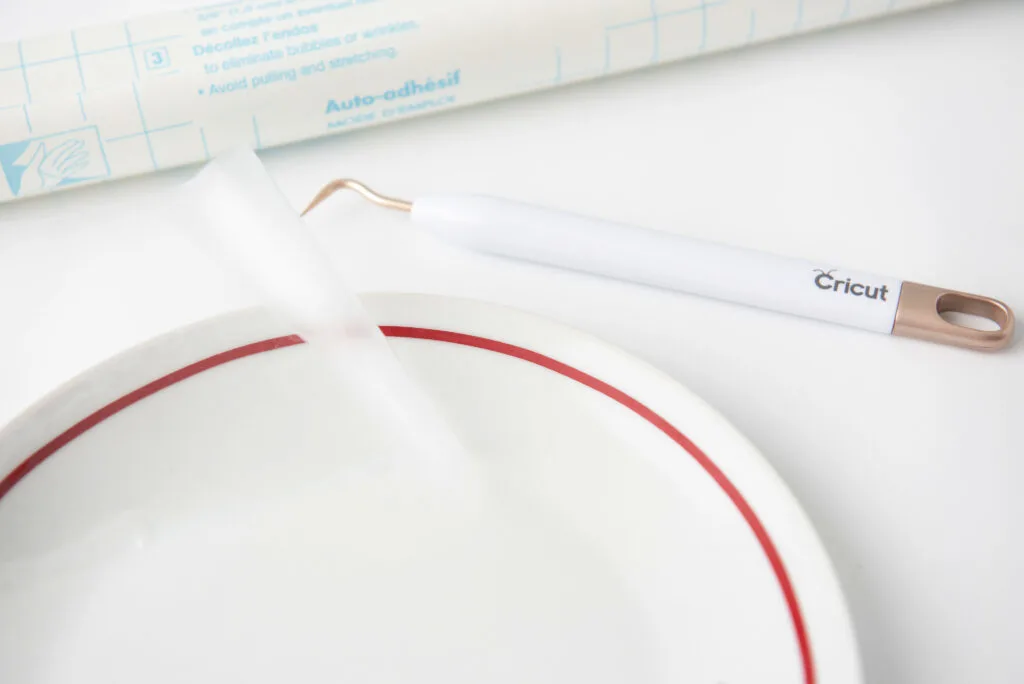
Place the vinyl on the transfer tape to the outer edge of the plate.
Here are some tips I learned along the way to help with the circle portion of the plate.
Once enough pressure had been applied slowly remove the transfer tape and very carefully and slowly rolling it away and off the board.

The vinyl will remain on your project. Repeat the steps above for the milk bottle.
However, apply the rectangular cut around the edge of the glass milk bottle under the spout.
Then apply the vinyl down the edge, starting at the bottom working up trying not to apply the vinyl on the dip of the bottle.
In an hour, you’ll have DIY holiday milk and cookies set that’s sure to become a new favorite!


MILK AND COOKIES FOR SANTA SET TIPS AND QUESTIONS
If you’ve never made Milk and Cookies for Santa Set, don’t worry! Below are some common questions and helpful tips.
Hopefully, this will answer any questions you may have. If not, feel free to ask in the comments and I’ll answer the best I can.
HOW LONG DOES IT REALLY TAKE TO MAKE A MILK AND COOKIES FOR SANTA SET?
This Milk and Cookies for Santa Set takes approximately 50 minutes. TOTAL. This includes:
- About 15 minutes to upload the files and cut the vinyl
- Close to 10 minutes to weed the designs
- Around 25 minutes to transfer the designs to the plate and bottle
WHAT GOES WELL WITH MILK AND COOKIES FOR SANTA SET?
Milk and Cookies for Santa Set go well with a wide variety of holiday crafts.
Your family will have a fun time making any of these family-friendly holiday crafts. Some of my personal favorites include:
- DIY Christmas Gift
- Snowmen Pretzel Jars
- Santa S’mores Craft
- Christmas Peeps Playdough
- Fruit Loop Candy Cane Ornaments


CAN I USE A COLORED PLATE INSTEAD OF A WHITE PLATE?
Yes, you can use a colored plate for this craft instead of a white plate. The steps will be pretty much the same. A red or green plate would look amazing with white vinyl.
HOW CAN I MAKE A CRICUT PLATE FOOD SAFE?
Vinyl is not usually food-safe because you cannot properly clean it and it contains toxins.
You can make the plate food-safe by using a sealant over the vinyl you have applied.
You can also place food on top of a napkin, or saran wrap so it does not come in contact with the vinyl.
Consider using this milk and cookies set only for decoration.
WHAT ELSE CAN I ADD TO THIS MILK AND COOKIES FOR SANTA SET CRAFT?
This simple DIY Milk and Cookies Plate Cricut Craft not only looks adorable, but it’s also incredibly versatile.
Try adding an extra plate that says, carrots for the reindeer.


MILK AND COOKIES FOR SANTA SET CRICUT CRAFT
Milk and Cookies for Santa Set Cricut Craft
Make sure to put out cookies and milk for Santa on this beautiful Milk and Cookies for Santa Set created using a Cricut. A white plate displays the words, cookies for Santa, all in bright red font with a glass milk jug that says, milk for Santa.
Materials
- Cricut or cutting machine
- Permanent vinyl (red, green, black or color of choice)
- Blue or green cutting mat
- Transfer tape
- Weeding tool
- Scrapper tool
- 7.5-8” white ceramic plate
- 6 x 21/4” glass milk bottle
Instructions
Step 1:
Start off by uploading the SVG’s for the plate and milk bottle in the design space. If using bigger glassware, adjust for the sizing as normal.
**NOTE: If using a 7.5-8” plate and 6 x 21/4” bottle, the sizing of the SVG’s is already sized for you.
**NOTE: If you are more experienced and skilled you can cut the first circle for the plate. If not, I recommend cutting the second circle for the plate as I will explain later on. This will cut the circle in two halves that will meet together on the edge of the plate.
** Also, I recommend cutting and placing in layers. The circle first, then the “cookies for Santa” design, then the design for the milk bottle. Use the eye feature in the layers panel to turn layers on and off. This will help much more than trying to attach the circle and words on the same piece of transfer tape.
Step 2:
Once sized accordingly, select make it in design space. Adjust the machine setting or material dial to a custom, washi sheet with more pressure. The svgs have small, thin, and delicate cuts as this setting will help it cut smoothly.
Load the permanent vinyl to your machine on the blue light grip mat or green standard grip map and hit “go”.
Step 3:
When the cuts are complete beginners to weed the vinyl off and away from the design using your weeding tool (looks like a dentist pick). Don’t forget to weed around the outside of the letters and small parts inside any letter that are enclosed (ex. a,e,o ).
Step 4:
After the designs are completely weeded, cut off a piece of transfer tape the size of the vinyl layers and apply the transfer tape using pressure with the scrapper tool. This is done in order to get the vinyl off its carrier sheet and onto the surface of the project.
**As mentioned above, cut and apply vinyl layers in this order: circle, cookies for Santa design, milk bottle circle, milk for Santa design. Each layer will need a piece of transfer tape.
Step 5:
Turn the entire design face down and begin to gently apply pressure and pull the vinyl’s carrier sheet off and away from the transfer tape.
Step 6:
Place the vinyl on the transfer tape to the outer edge of the plate. Here are some tips I learned along the way to help with the circle portion of the plate.
• A plate with a flat edge would work best
• Cut and use the circle that is cut in two halves and have them met in the middle along the edge of the plate. Otherwise, if you cut and use the fully enclosed circle this will be a bit trickier to apply to the plate as it has a curved edge.
• If you cut and use the fully enclosed circle, there is a small slice in the circle. When applying to the plate, start on one side of the slit, applying it to the plate and removing the transfer tape as you go around. Finish with the other side of the slit meeting that first side of the slit.
• If needing additional assistance, cut small slits at the top of the transfer
tape getting as close to the edge of the vinyl as possible and remove transfer tape as you apply.
Step 7:
Once enough pressure had been applied slowly remove the transfer tape and very carefully and slowly roll it away and off the board. The vinyl will remain on your project.
Step 8:
Repeat the steps above for the milk bottle. However, apply the rectangular cut around the edge of the glass milk bottle under the spout. Then apply the vinyl down the edge, starting at the bottom working up trying not to apply the vinyl on the dip of the bottle.
**NOTE: Vinyl is to the side on the plate for the purpose of not touching any food, however, please note that in order to make the plate fully food-safe a sealant would need to be applied or a napkin used on the plate.
WHAT’S NEXT
I hope you enjoy this DIY Holiday Cricut Craft as much as my family does!
If you get a chance to try it, let us know! Leave us a comment below, or share it with a picture on Instagram or Facebook! Don’t forget to tag us @kelly_reci_ and use the hashtag #Kellysthoughtsonthings so we can see what amazing meals you are cooking up!