
Learn how to make simple Cricut Spider Halloween Jar with step-by-step directions for your Cricut.

This Halloween Cricut craft is a must-make this fall!
Jars are painted white, with vinyl cut-out spiders, and the word, BOO.
This Cricut Halloween jar craft will easily become your classic fall decor every year!
In fact, this particular Cricut Spider Halloween Jar craft is so cute you might want them all over your home this fall.
In a little over two hours, you’ll have a fun, simple, white flower vase, with tiny spiders all over ready to enjoy!
HOW TO MAKE CRICUT SPIDER HALLOWEEN JAR
Cute vinyl spiders are applied to painted jars with the words, BOO.
This is a simple Halloween Cricut craft the whole family will enjoy!
Are you ready to get started?
You’ll find the specific supplies and detailed instructions in the printable recipe at the bottom of this post.

TOOLS YOU NEED
Disclosure: This blog post contains affiliate links for products or services we think you’ll like. This means if you make a purchase from one of these links, Kelly’s thoughts On Things may make a small commission at no additional cost to you. We only recommend items we use and love.
CRICUT SPIDER HALLOWEEN JAR SUPPLIES

This fun Cricut Spider Halloween Jar uses easy to find supplies to create a simple decor item your family will love.
All you need is:
- All Over Spider SVG file
- Cricut premium vinyl, permanent in black
- 3 glass jars with lids removed
- americana chalky finish (for glass) in everlasting
CRICUT SPIDER HALLOWEEN JAR INSTRUCTIONS
First, gather the supplies so you have it all in one space.
Take the jars and thoroughly wash them with soap and hot water and let them dry completely before using them.
Preparing the Mason Jars

Apply a thin coat of chalky finish paint to each of the mason jars.
Put aside to dry fully and repeat with additional coverage as needed.
Preparing the Images
Open Cricut Design Space.
Click on the “+” sign to start a new project, opening up a blank canvas.
Click on the “Upload” button from the toolbar and browse your downloaded files to insert the SVG file.

The cut image will appear on the canvas. Click on the “Ungroup” button.

Highlight the dangling spiders image and click on the “Attach” button to secure all parts of the image together for cutting.

Highlight the bunches of spiders and click on the “Attach” button to secure all parts of the image together for cutting.

Right-click on the bunches of spiders and duplicate the image to cut more spiders as needed.
Maintain the size or adjust to fit your jars.
To adjust the size, highlight the image, and click on the size box in the top toolbar.
Change the measurement to suit your jars accordingly.
Creating the BOO text

Select the text icon from the toolbar. Type BOO.

Change the font to “Little White Lies”.
With the word highlighted, adjust the letter spacing to 0.7.
Stretch the lettering by clicking on the lock symbol above the size section and adjusting the height to 1.7” while keeping the width the same.

Next, click on the unlock symbol and adjust the word height to 2.75”.
With the word highlighted, click on the “Attach” button.
Cutting the Permanent Vinyl
Select “Make It” in Design Space.

Choose “On Mat” to cut vinyl using Cricut Joy cutting mat.

Follow prompts for loading the mat into the Cricut Joy and cutting the Premium Vinyl.

When prompted, unload the mat from the cutting machine.
Remove the Premium Vinyl from the mat.
How to Assemble the Jars

Using the weeding tool, peel away the excess vinyl around the cut images and discard.

Cut around each spider and image with a pair of scissors.

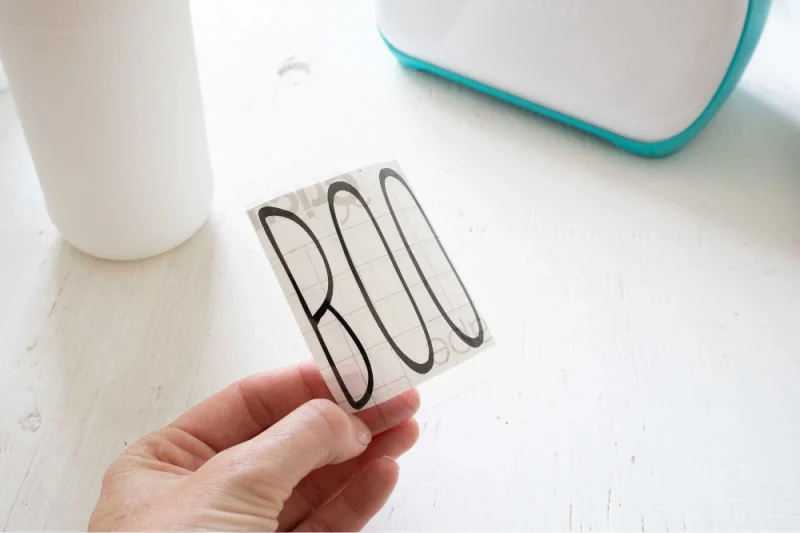
Cut a piece of transfer tape a bit larger than the size of the word BOO.
Peel away the transfer tape backing but ensure the transfer tape is not overly sticky.
Dab the sticky side of the transfer tape with your hand to weaken the adhesive.
Place the transfer tape over the top of the image.
Gently rub the vinyl to help it stick to the transfer tape.
Peel away the vinyl backing, leaving just the image adhered to the transfer tape.

Position the image with the transfer tape on to the lower part of the jar and press in place.
Press the vinyl down with your fingers to help it to stick to the painted glass jar.

Slowly and carefully remove the transfer tape leaving the vinyl image on the jar.

Repeat for the other spider images placing them all over the jar in a random pattern.
To finish, fill the containers with artificial flowers or other Halloween decor.


CRICUT SPIDER HALLOWEEN JAR TIPS AND QUESTIONS
If you’ve never made Spiders using a Cricut, don’t worry!
Below are some common questions and helpful tips.
Hopefully, this will answer any questions you may have.
If not, feel free to ask in the comments and I’ll answer the best I can.
HOW LONG DOES IT REALLY TAKE TO MAKE CRICUT SPIDER HALLOWEEN JARS?
One of the many reasons I love my Cricut is because everything you make looks so professional and takes much less time.
This Cricut Spider Halloween Jar craft takes approximately 124 minutes (2 hours and 4 minutes). TOTAL.
This includes:
- About 5 minutes to gather all of your supplies
- Close to 10 minutes to wash the jars and allow them to completely dry
- Around 15 minutes to paint 3 jars
- Allow an hour for the paint to dry
- 7 minutes to prepare the images in your Cricut Design Space
- Around 7 minutes to prepare the BOO text
- 5 minutes to print the vinyl
- 15 minutes to transfer the images onto the jars


WHAT GOES WELL WITH CRICUT SPIDER HALLOWEEN JAR?
Cricut Spider Halloween Jars go well with a wide variety of Halloween inspired decor.
Some of my personal favorites include:
- Painted Pumpkins
- Fake Cobwebs
- Scarecrows
- Fall Leaves
CAN I USE SPIDER STICKERS INSTEAD OF THE CRICUT SPIDERS?
Yes, you can use spider stickers in this craft instead of spiders created in the Cricut.
The final look of the jars will be slightly different.
WHAT ELSE CAN I ADD TO THIS CRICUT SPIDER HALLOWEEN JAR?
This simple Cricut Spider Halloween Jars craft is not only easy, but it’s also incredibly versatile.
Try adding a black cobweb image to the bottles.

Grab the SVG HERE!


CRICUT SPIDER HALLOWEEN JAR
Cricut Spider Halloween Jar
Learn how to make simple Cricut Spider Halloween Jars with step-by-step directions for your Cricut. This Halloween Cricut craft is a must-make this fall! Jars are painted white, with vinyl cut-out spiders, and the word, BOO.
Materials
- All Over Spider SVG file
- Cricut premium vinyl, permanent in black
- 3 glass jars with lids removed
- americana chalky finish (for glass) in everlasting
Tools
- Cricut Joy with Fine Point Blade
- Scissors
- Weeder Tool
- Paintbrush
- Standard Grip Mat
Instructions
Gather supplies.
- Thoroughly wash jars with soap and hot water and let them dry completely before using.
Preparing the Mason Jars
- Apply a thin coat of chalky finish paint to each of the mason jars. Put aside to dry fully and repeat with additional coverage as needed.
Preparing the Images
- Open Cricut Design Space.
- Click on the “+” sign to start a new project, opening up a blank canvas.
- Click on the “Upload” button from the toolbar and browse your downloaded files to insert the SVG file.
- The cut image will appear on the canvas. Click on the “Ungroup” button.
- Highlight the dangling spiders image and click on the “Attach” button to secure all parts of the image together for cutting.
- Highlight the bunches of spiders and click on the “Attach” button to secure all parts of the image together for cutting.
- Right click on the bunches of spiders and duplicate the image to cut more spiders as needed.
- Maintain the size or adjust to fit your jars. To adjust the size, highlight the image and click on the size box in the top toolbar. Change the measurement to suit your jars accordingly.
Creating the BOO text
- Select the text icon from the toolbar.
- Type BOO.
- Change the font to “Little White Lies”.
- With the word highlighted, adjust the letter spacing to 0.7.
- Stretch the lettering by clicking on the lock symbol above the size section and adjusting the height to 1.7” while keeping the width the same.
- Next, click on the unlock symbol and adjust the word height to 2.75”.
- With the word highlighted, click on the “Attach” button.
Cutting the Permanent Vinyl
- Select “Make It” in Design Space.
- Choose “On Mat” to cut vinyl using Cricut Joy cutting mat.
- Follow prompts for loading the mat into the Cricut Joy and cutting the Premium Vinyl. When prompted, unload the mat from the cutting machine.
- Remove the Premium Vinyl from the mat.
How to Assemble the Jars
- Using the weeding tool, peel away the excess vinyl around the cut images and discard.
- Cut around each spider and image with a pair of scissors.
- Cut a piece of transfer tape a bit larger than the size of the word BOO.
- Peel away the transfer tape backing but ensure the transfer tape is not overly sticky. Dab the sticky side of the transfer tape with your hand to weaken the adhesive.
- Place the transfer tape overtop of the image. Gently rub the vinyl to help it stick to the transfer tape. Peel away the vinyl backing, leaving just the image adhered to the transfer tape.
- Position the image with the transfer tape on to the lower part of the jar and press in place.
- Press the vinyl down with your fingers to help it to stick to the painted glass jar.
- Slowly and carefully remove the transfer tape leaving the vinyl image on the jar.
- Repeat for the other spider images placing them all over the jar in a random pattern.
- To finish, fill the containers with artificial flowers or other Halloween decor.
WHAT’S NEXT
I hope you enjoy this craft as much as my family does!
If you get a chance to try it, let us know! Leave us a comment below, or share it with a picture on Instagram or Facebook! Don’t forget to tag us @kelly_reci_ and use the hashtag #Kellysthoughtsonthings so we can see what amazing meals you are cooking up!
Check out these crafts you can find here on Kelly’s Thoughts On Things.