
Are you a busy coffee lover who craves the creamy goodness of frothed milk in your favorite caffeinated beverages?
You’re not alone! Frothed milk adds a delightful touch to coffee, creating a smooth texture and enhancing the flavor profile.
However, for those with a packed schedule, finding the time to froth milk can be a challenge. But fear not because we’ve got you covered!
In this guide, we’ll explore how to froth milk in the most efficient methods for busy coffee drinkers.
Get ready to enjoy café-quality frothed milk in your morning cup of joe, even on the busiest days. Let’s dive in!
Choosing the Right Milk for Frothing


When it comes to frothing milk, selecting the right type of milk is crucial.
Different milk varieties have varying fat content, protein composition, and texture, all affecting the frothing process and result. Here are some options to consider:
- Whole Milk: With its higher fat content, whole milk is often favored for frothing due to its ability to create a rich and creamy texture. It produces thick and velvety microfoam, perfect for lattes and cappuccinos.
- Low-Fat or Skim Milk: Lower-fat milk options can still be used for frothing, but they may yield a lighter and less creamy foam than whole milk. However, they offer a healthier alternative and can still achieve satisfactory results.
- Non-Dairy Alternatives: Those with lactose intolerance or dietary preferences can opt for non-dairy milk alternatives such as soy, almond, or oat milk. Due to their composition, these varieties may require different frothing techniques, so experimentation is key to finding the one that suits your taste.
It’s worth noting that the freshness of the milk also plays a role in frothing. Fresher milk tends to produce better results, so ensure that your milk is within its expiration date.
3 Quick Frothing Methods for Busy Coffee Drinkers
Method 1: Using an Espresso Machine

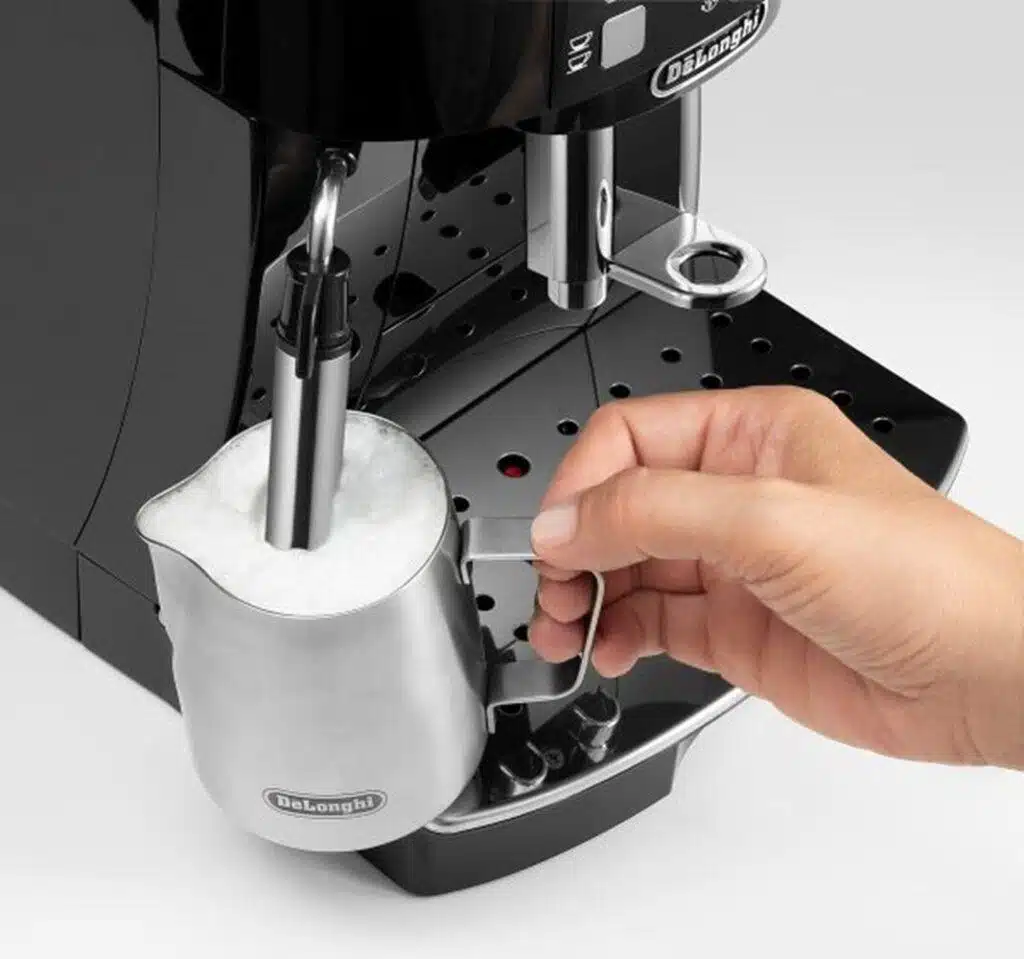
You’re in luck if you’re a busy coffee enthusiast with an espresso machine! These versatile machines often come equipped with a steam wand, making them perfect for frothing milk.
This magic device provides a professional-level frothing experience for busy coffee drinkers.
If you don’t have one, don’t hesitate to find the best espresso machine for your kitchen to create luxurious, café-quality frothed milk at home.
Here’s a step-by-step guide on how to make froth milk using an espresso machine:
- Step 1 – Prepare the Milk: Pour cold milk into a frothing pitcher, filling it no more than one-third full to leave room for expansion during frothing.
- Step 2- Position the Steam Wand: Before frothing, activate the steam wand briefly to purge any residual water and ensure optimal steam pressure. Place the steam wand tip just below the surface of the milk, positioning it slightly off-center to create a swirling motion.
- Step 3 – Frothing Process: Open the steam valve to release steam and start frothing. Lower the pitcher gradually to maintain the tip just below the milk’s surface. As steam is introduced, it will incorporate air into the milk, creating a velvety foam.
Pay close attention to the milk’s temperature during frothing. Aim for a range of 150-160°F (65-70°C), as temperatures above 160°F (70°C) can scorch the milk and affect the taste.
- Step 4 – Texture the Milk: As the milk expands and heats up, submerge the steam wand deeper into it to heat it further while maintaining a gentle whirlpool motion. This process helps create a creamy and smooth texture.
- Step 5 – Turn Off the Steam: Once the milk reaches the desired temperature and achieves a silky foam, turn off the steam valve and remove the steam wand.
- Step 6 – Clean and Purge: Immediately after frothing, purge the steam wand to remove any milk residue and prevent clogging.
- Step 7 – Pour and Enjoy: With the espresso shot ready, pour the frothed milk gently into the cup, combining it with the espresso to create a harmonious balance of flavors.
Method 2: Using a Milk Frother

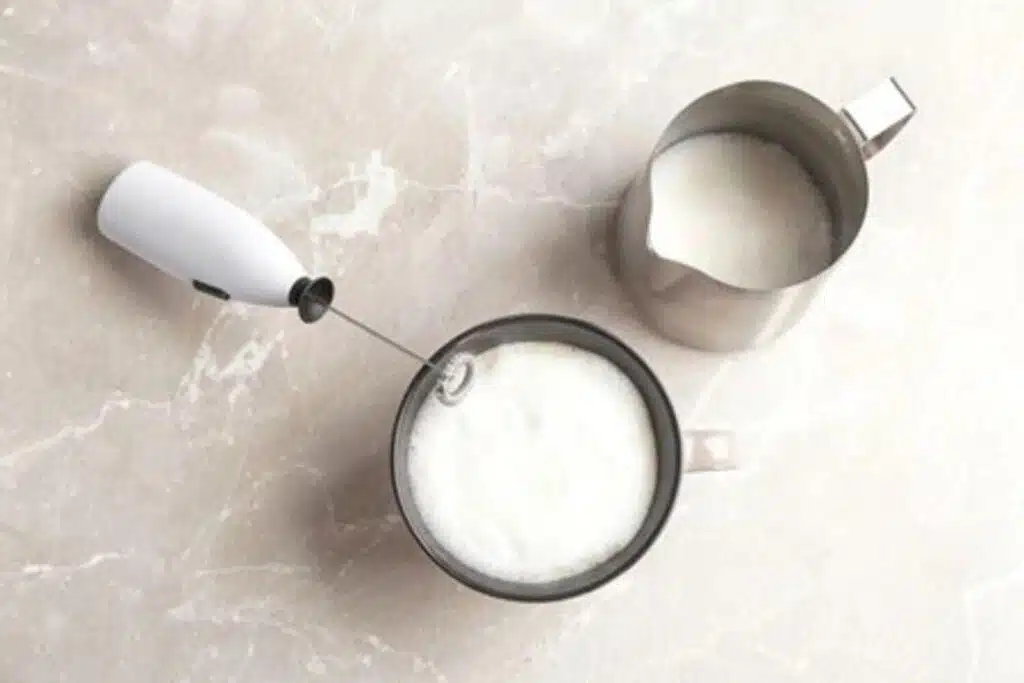
If you’re a busy coffee lover looking for a quick and efficient way to froth milk, investing in an electric milk frother is an excellent option.
These handy devices are specifically designed to create creamy froth with minimal effort. Here’s how to use a milk frother to make froth:
- Step 1 – Prepare the Milk: Pour cold milk into the frother’s container. Check the frother’s guidelines for the recommended milk level, as overfilling may affect the frothing process.
- Step 2 – Frothing Process: Attach the frothing whisk to the frother and secure the lid. Power on the frother, and select the frothing mode. The device will start spinning the whisk, creating a vortex incorporating air into the milk. Within a few minutes, you’ll witness the milk transforming into a luscious, frothy texture.
- Step 3 – Adjust and Monitor: Some milk frothers offer customization options, allowing you to adjust the froth density or temperature. Follow the frother’s instructions for making adjustments, if desired. While the milk froths, keep an eye on its temperature to ensure it doesn’t overheat.
- Step 4 – Pour and Enjoy: Once the milk reaches the desired frothiness, carefully pour it into your freshly brewed coffee, swirling gently to incorporate the foam. Watch as the velvety foam gracefully settles on the surface, creating an enticing presentation.
An electric milk frother provides a hassle-free experience, requiring minimal manual effort. It’s a convenient option for busy individuals who seek a consistent and efficient method of frothing milk.
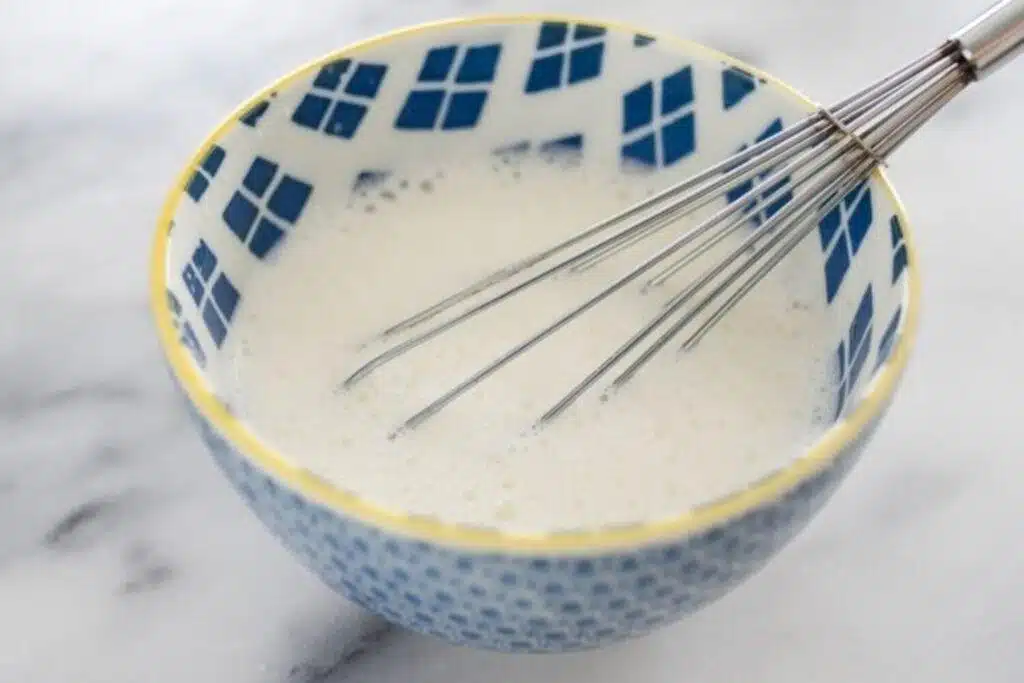
Method 3: Microwaving and Whisking Technique

You’re a busy coffee lover without access to specialized frothing equipment? Don’t worry!
There’s a simple and efficient method for frothing milk that requires just a good microwave and a whisk.
Here’s how to froth milk using the microwaving and whisking technique:
- Step 1 – Heat the Milk: Pour the desired amount of milk into a microwave-safe container. Heat the milk in the microwave on high for about 30-45 seconds or until it becomes warm but not boiling.
- Step 2- Whisking Process: Take the container out of the microwave and hold it firmly. Grab a whisk and vigorously whisk the milk in a quick back-and-forth motion. The whisking action will introduce air into the milk and create froth.
Keep whisking until you achieve the desired frothiness. The more you whisk, the thicker the foam will become. Take breaks intermittently to check the progress and adjust your whisking speed accordingly.
- Step 3 – Settle the Foam: Allow the frothed milk to sit for a few moments, allowing the foam to settle and stabilize.
Once settled, carefully pour the milk into your coffee, holding back the froth with a spoon if desired. The frothed milk will gracefully blend with your coffee, adding a touch of elegance and indulgence.
The microwaving and whisking technique is a quick and accessible method for frothing milk, especially for those on the go.
While it may not produce the same level of microfoam as specialized equipment, it still creates a satisfying froth that enhances the taste and presentation of your coffee.
So, even without fancy machines, you can easily enjoy a creamy and frothy coffee experience, perfect for busy mornings or whenever you crave a comforting cup of joe.
Conclusion
Frothed milk adds a touch of indulgence and elegance to your coffee experience.
For busy coffee drinkers, finding quick and efficient methods to froth milk is essential.
Whether you opt for a milk frother, the microwaving and whisking technique, or utilize an espresso machine, there are various ways to achieve creamy and frothy milk in no time.
With these methods and time-saving hacks in your arsenal, you can enjoy the delights of café-quality frothed milk, elevating your coffee enjoyment even on the busiest days. Cheers to deliciously frothy coffee moments!