
When it comes to Halloween treats, I love creating snacks that are not only tasty but also fun and easy to make. These Halloween Bat Snack Cakes are perfect for adding a spooky twist to your festivities, and they’re so simple that even the kids can help! With just a few ingredients, you can transform Little Debbie Swiss Rolls into adorable bat-shaped treats that will steal the show at any Halloween gathering.

Why You’ll Love This Recipe
If you’re looking for a Halloween recipe that’s low on prep but high on fun, this is it! Here’s why you should give these Halloween Bat Snack Cakes a try:
- Easy to Make: Using store-bought Swiss Rolls as the base makes this recipe incredibly easy. No need to bake—just decorate!
- Perfect for Kids: Kids will have a blast adding faces and wings to their bats. It’s a fun family activity that also lets them get creative.
- Cute and Spooky: These little bat cakes are as cute as they are spooky. They’re sure to be a hit with both kids and adults at any Halloween party.
- Quick Prep Time: With minimal ingredients and simple steps, you can have these bats ready in under an hour, making them perfect for last-minute Halloween treats.
Ingredients: What You’ll Need

Let’s break down the ingredients you’ll need to create these bat snacks. Each component has been chosen to make the recipe easy, fun, and delicious.
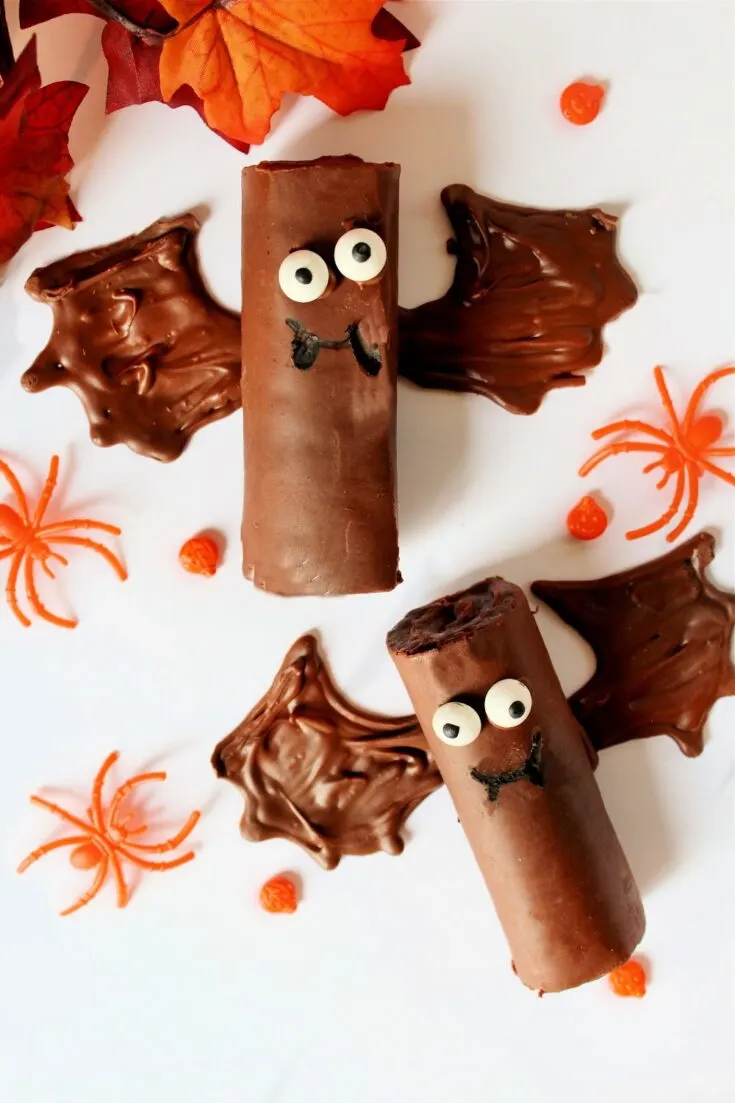
- 1 Box of Little Debbie Swiss Rolls: The foundation of this recipe! Swiss Rolls are soft, chocolatey, and have that perfect cylinder shape to create a bat body.
- Black Edible Food Coloring Marker: This is for drawing spooky details, like fangs or mouths, on each bat. It’s a quick and mess-free way to add personality to your bats.
- 1 ½ Cups of Milk Chocolate: Melted chocolate serves two purposes here—it helps attach the eyes and creates those iconic bat wings. Milk chocolate works well because it’s sweet and melts smoothly, but you can also use dark chocolate if you prefer.
- Candy Eyes: These add the final touch that really brings your bats to life. You can find candy eyes at most grocery stores or online, and they’re perfect for Halloween treats.
Instructions: Step-by-Step Guide to Bat Snack Cakes
Now, let’s go through the process of making these Halloween Bat Snack Cakes. I’ve broken it down step-by-step, so you can easily follow along and get these spooky treats ready in no time.

Prep the Bat Wings: Start by laying out a piece of parchment paper. Using a marker or pen, draw bat wings directly on the parchment. Make sure to leave enough space between each set of wings so you can fit a Swiss Roll on top. This step sets the foundation for your bats, so take your time and have fun with it!
Create the Bat Faces: Now for the fun part! Use the black edible food coloring marker to draw mouths on each Swiss Roll. Want your bats to have fangs? Go for it! You can get as creative as you want. This is a great step for the kids to help with, as they can personalize each bat with different facial expressions.

Melt the Chocolate: Set up a double boiler and melt the milk chocolate until it’s smooth and fully melted. You want it to be fluid enough to pipe, so keep an eye on it and stir regularly. Once melted, transfer the chocolate to a small squeeze bottle or pastry bag fitted with a fine tip. This will give you control when creating the wings and attaching the candy eyes.

Attach the Candy Eyes: Using a small dab of melted chocolate, attach the candy eyes just above the mouth on each snack cake. Let the chocolate cool slightly to ensure the eyes stick well. The eyes add an adorable touch and make the bats look like they’re ready for some Halloween fun.
Make the Chocolate Wings: Squeeze the melted chocolate into the bat wing outlines on the parchment paper, filling them in completely. You want a nice, thick layer so that the wings are sturdy enough to support the snack cakes. Once you’ve filled in the wings, pipe a strip of chocolate down the center, then gently place a Swiss Roll on top, pressing lightly to secure it.

Chill the Bats: Place the entire sheet in the fridge for about 5-10 minutes, allowing the chocolate to set. This step is essential for making sure the wings are fully hardened and ready to handle. While they chill, you can clean up and get ready for the final step.
Release the Bats from the Parchment: Once the chocolate has set, carefully peel each bat from the parchment paper. They should come off easily, but take your time to avoid breaking the wings. Now you’re ready to serve your Halloween Bat Snack Cakes!

Tips for the Best Halloween Bat Snack Cakes
Here are a few extra tips to ensure your Halloween Bat Snack Cakes turn out perfectly:
- Use a Squeeze Bottle or Pastry Bag: This makes it easy to control the chocolate when creating the wings and attaching the eyes. If you don’t have either, you can also use a plastic sandwich bag with a small corner snipped off.
- Let the Chocolate Cool Slightly: Before attaching the candy eyes, let the melted chocolate cool for a few seconds. If it’s too hot, it can melt the candy eyes or make them slide around.
- Be Gentle When Removing from the Parchment: The wings should be fully set before you remove the bats from the parchment paper. If you notice they’re still soft, give them a few more minutes in the fridge.
Serving Suggestions and Storage
These Halloween Bat Snack Cakes are best enjoyed fresh, but if you have leftovers (unlikely!), you can store them in an airtight container at room temperature for up to two days.
Avoid keeping them in the fridge for long periods, as the chocolate can start to look dull.

Why These Bat Snack Cakes Are a Perfect Halloween Treat
These Halloween Bat Snack Cakes aren’t just delicious, they’re also a great way to bring some Halloween spirit into your home. Kids love decorating them, and adults love eating them!
Plus, they’re simple enough that you don’t need any fancy equipment or skills. Just a few ingredients and a bit of creativity, and you’re ready to go!
Whether you’re hosting a Halloween party or just looking for a fun activity to do with the kids, these Halloween Bat Snack Cakes are a fantastic choice.
They’re easy, delicious, and absolutely adorable. I hope you enjoy making these spooky treats as much as I did!

Halloween Bat Snack Cakes Recipe
Halloween Bat Snack Cakes
These Halloween Bat Snack Cakes are perfect for adding a spooky twist to your festivities, and they’re so simple that even the kids can help! With just a few ingredients, you can transform Little Debbie Swiss Rolls into adorable bat-shaped treats that will steal the show at any Halloween gathering.
Ingredients
- 1 box of Little Debbie Swiss Rolls
- Black edible food coloring marker
- 1 ½ cups of milk chocolate
- Candy eyes
Instructions
- Start by drawing bat wings on a piece of parchment paper. Be sure you leave enough room between each wing for the snack cake.
- Using the food marker, draw a mouth or some fangs.
- Over a double broiler melt the chocolate until it’s smooth. Transfer melted chocolate into a small squeeze bottle or pastry bag.
- Squeeze a small drop of chocolate onto the back of each eye and attach it to the snack cake right above the mouth
- Squeeze the melted chocolate in the outline for your bat wings and fill the whole inside. Pipe a strip of chocolate in the middle of the wings and set the snack cake on the top of the strip.
- Place bats into the fridge for about 5-10 minutes, allowing the wings to fully set.
- Remove from the fridge and carefully release from the parchment paper.