
This post may contain affiliate links. This means if you click on the link and purchase the item, I will receive an affiliate commission at no extra cost to you. All opinions remain my own.
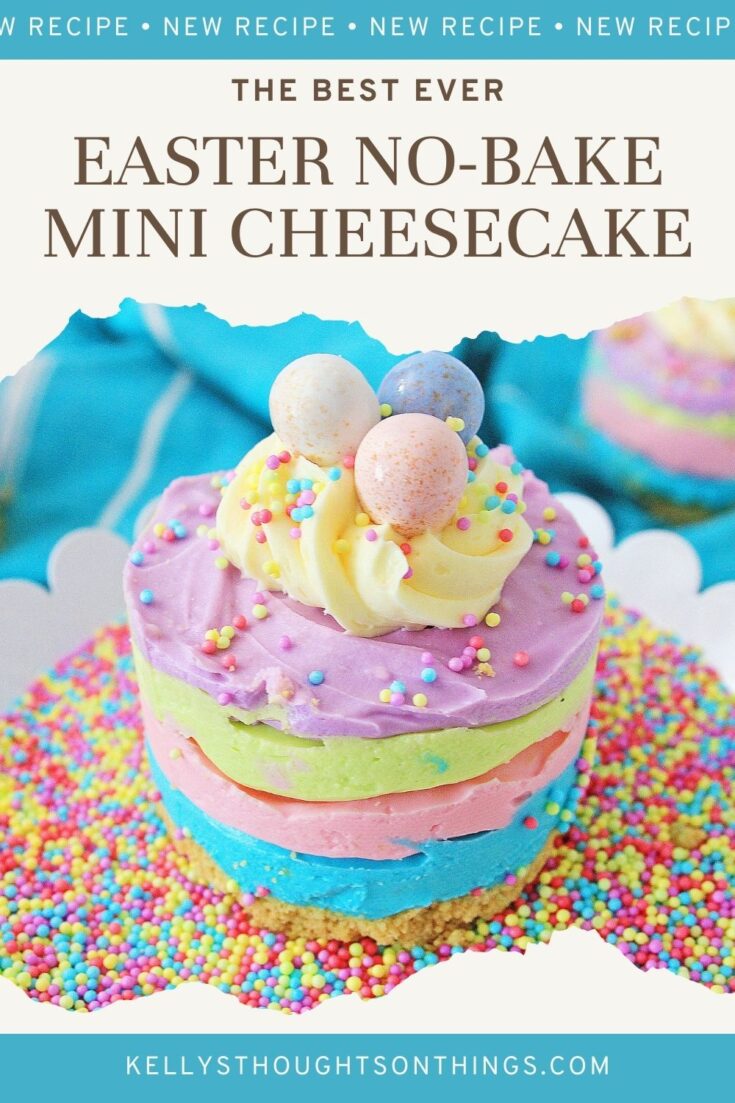
Easter is around the corner and that means lots of delicious food! This fun and colorful Easter no-bake mini cheesecakes are perfect for any celebration.
They’re fluffy, creamy, and absolutely delicious. Plus, they’re so easy to make you’ll have them whipped up in no time!

Need a dessert idea for Easter that doesn’t require baking? The only thing better than a delectable treat is one that’s super easy to make.
That’s where this no-bake cheesecake comes in!
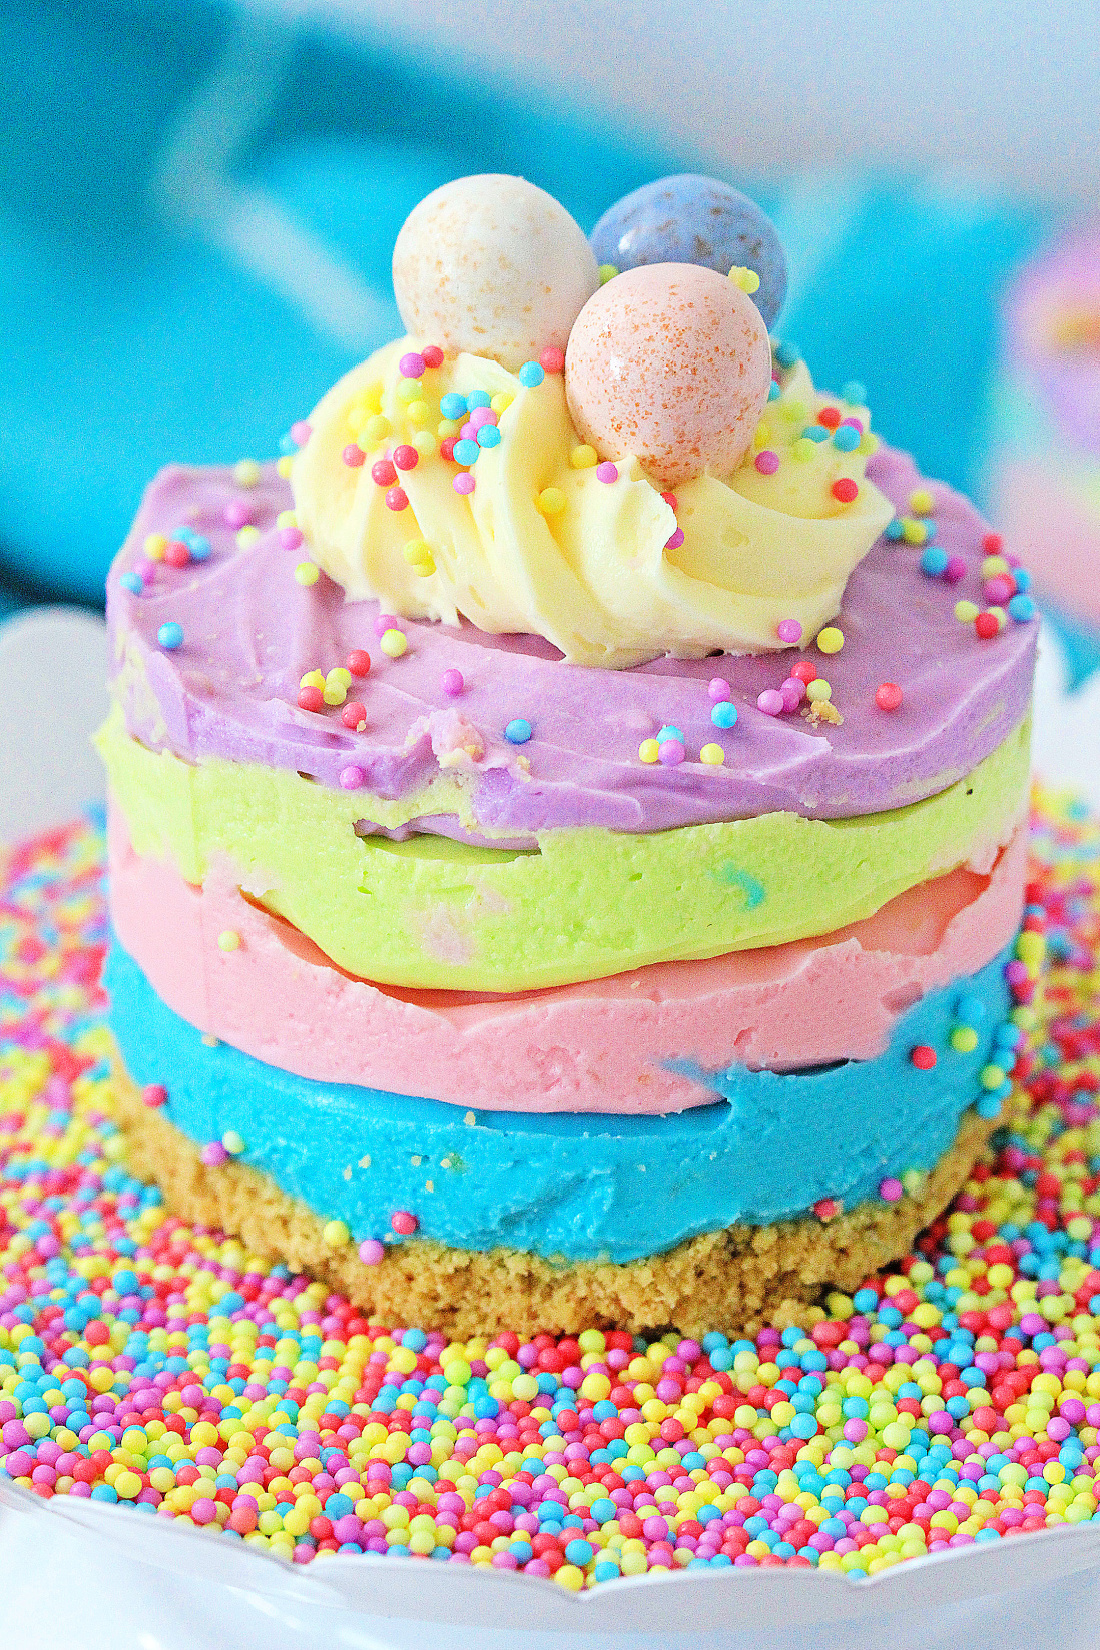
This easy Easter dessert is all about the cute pastel striped cheesecakes! No baking required! Celebrate Easter with a fun and colorful twist!
Why You’ll Love This/These Easter No-Bake Mini Cheesecake
- With this delicious Easter No-Bake Cheesecake, you’ll be able to impress your loved one! It’s simple to get by with the ingredients. It’s likely that most of these recipes may only require a few basic items that you already have on hand.
- Make a light and fluffy cheesecake that melts in your mouth with this easy recipe. There is no better way to celebrate Easter than with a dessert,
- Sending this Easter No-Bake Mini Cheesecake as a gift to a loved one is a great idea. This cheesecake is sure to be a “heartfelt” gift with its creamy filling and soft, buttery crust!
The celebration of Easter and the coming of spring is accented by this tasty dessert sure to delight everyone at your dinner table.
A no-bake treat that takes only a few minutes to put together. Add a striping effect with it, it’s easy to make and fun to eat!


You can find the full recipe with ingredients and instructions in the printable card below.
Equipment Needed to Make Easter No-Bake Mini Cheesecake
- Stand Mixer
- 9 Inch Spring-Form Pan
- Parchment Paper
- Bowls
- Spoons
- Whisk
- Spatulas
- Frosting Tip for Piping
- Pastry Bag
- Sheets of Copper Mats or Pastry Rings
Ingredients For Your Easter No-Bake Mini Cheesecake
For the Crust:
- Graham Crackers – Crushed
- Butter – Melted
- Sugar
For the Cheesecake:
- Cream Cheese – Softened
- Powdered Sugar
- Vanilla Extract
- Lemon Juice
- Cheesecake Flavored Instant Pudding Mix
- Buttercream Frosting
- Cadbury Mini Eggs
- Easter Nonpareils
How To Make A Fluffy Easter No-Bake Mini Cheesecake
Step 1: Copper Mats Preparation


Measure the copper mats, and cut them into 3-inch-high strips. Fold the strips to meet ends, until you have about 3 inches, in diameter.
Cut the strip where needed, and leave enough extra to tape the ends of the strip together. Tape the ends of the strip with duct tape, and make sure it is secured along the edges.
Note: The copper mats used to form the circles will not stick to the cheesecakes. They are copper grill mats, but we found them to be a good tool for mini cheesecakes. If you have Pastry molds or stainless steel plating rings, you can use those instead. When you cut the copper mats to form the circles, or rings to form the cheesecakes, you may have pieces that you’ll need to tape together to make another circle.
Step 2: Prep the Crust
Place the copper circles on a piece of parchment paper, on a cookie sheet. Mix the graham cracker crumbs, melted butter, and sugar together in a separate bowl, and place an equal amount in each copper circle.
Tap the crumbs down with the end of a wooden spoon, until they are all even and compact in the bottom of the copper circle. Place in the freezer.
Step 3: Cheesecake Mix
In the mixing bowl of a stand mixer, mix the softened cream cheese until smooth and creamy. Stop the mixer and scrape down the bowl, and mix again.
Add the vanilla, and lemon juice, and mix. In a separate bowl, add half of the 3-ounce package of instant cheesecake flavored pudding, and 1/2 a cup of half and half, and mix with a whisk until the pudding is smooth, and no longer grainy.
Add the additional 2 Tablespoons as needed, to make the pudding smooth. When the pudding is smooth and thick, add it to the mixing bowl, and blend until completely smooth with the cream cheese.
Add the powdered sugar a little at a time, and blend well after each addition. Scrape down the mixing bowl, and blend again.
Step 4: Divide and Color
Divide the cheesecake batter evenly between 4 small bowls. In one bowl, add a drop of Aqua food coloring gel, and stir.
In the next bowl, add a drop of pink food coloring gel, and stir.
Instagram is an amazing place to be! We’re always on there sharing our everyday adventures with you. Join us on Instagram as we share our travels, recipes, and crafts! Be sure to check out the stories for real-time fun.


In the next bowl, add a drop of Neon lime green food coloring gel, and stir – you may need to add another drop of the lime green.
In the last bowl, add a drop of purple food coloring gel, and stir. Depending on what brand of food coloring gel you use, you may need to add a little more or less than one full drop to achieve the pastel color desired.
Step 5: Assemble Time


Remove the graham cracker crumbs from the freezer, add an equal amount of the Aqua-colored cheesecake on top of the graham cracker crumbs, and place back in the freezer.
Wait 30 minutes, take the cheesecakes out of the freezer, and add an equal amount of Pink cheesecake on top of the Aqua.


Place the cheesecakes back in the freezer for 30 minutes, and then take them out and add an equal amount of the lime green cheesecake on top of the Pink.


Place the cheesecakes back in the freezer, and after 30 minutes, remove them, and add the Purple cheesecake on top of the lime green cheesecake in equal amounts.
Smooth the tops, and place back in the freezer until time to serve.


When ready to serve, remove the tape from the copper circles, and remove the copper circles from the cheesecakes, leaving the cheesecakes on the parchment-lined cookie sheet.
Add a swirl of frosting on top of the cheesecakes, and sprinkle with the Easter Nonpareils. Place three of the mini eggs on the frosting.
Serve and enjoy! This makes 6 3-inch mini cheesecakes.


NOTE: If you want to remove the copper circles, and decorate the cheesecakes ahead of time, simply place them back in the freezer until time to serve. When adding the different colors of cheesecake to the copper circles, smooth the cheesecake batter out as much as possible to the edge of the circle, all the way around, so that you have smooth layers when the copper circles are removed.
What to Serve/Pair with Your Easter No-Bake Mini Cheesecake
Main Dish
With the same care, choose your entrée. Your guests will not be in the mood for cheesecake after a lunch that is heavy on cream and butter.
Consider white fish, chicken breast, or grilled meats instead of salmon or pulled pork, and relatively plain herbed rice and vegetables instead of rich casseroles or scalloped potatoes.
Appetizers
Avoid using equally rich components in your appetizers if your meal will culminate with a cheesecake. If you’re hosting a party, opt for lighter options like marinated veggies instead of heavy or cheesy canapes.
Simple vinaigrettes, rather than thick ranch or blue cheese dressings, should be used to make salads that are light, crisp, and green.
Soups that are light and brothy rather than creamy or heavy are a good way to start the night.
Drinks
A slice of rich, decadent cheesecake goes perfectly with a cup of strong coffee or tea, creating the ideal moment of self-indulgence.


Popular Substitutions & Additions
If you are a little short on time, then the perfect recipe for this Easter is this No-Bake Cheesecake. This creamy cheesecake will sure be great for any Easter celebration.
Try adding some fresh strawberry slices on top for more extra added flair. You can also top it off with whipped cream.
You can also try these toppings:
- Chocolate Chips
- Chocolate Shavings
- Chocolate or Caramel Drizzles
- Fresh or Dried Fruits
- Shredded Coconut
- Crushed Toffee Bars
- Mini Marshmallows
How To Store Fluffy Easter No-Bake Mini Cheesecake
Best Way To Store Easter No-Bake Mini Cheesecake Leftover
Refrigerate for at least 6-8 hours and up to 2 days, tightly wrapped in plastic wrap or aluminum foil. It is best to wait 12 hours for the best results.
The longer the no-bake cheesecake is refrigerated, the better it will set up.
How Long Will Fluffy Easter No-Bake Mini Cheesecake Last In the Fridge?
When well covered, this cheesecake will keep in the fridge for about 4-5 days.
While you could continue to eat it after that, it will only be at its peak for that amount of time.
Can I Freeze Easter No-Bake Mini Cheesecake
No-bake cheesecake keeps well in the freezer for up to 3 months. Thaw in the refrigerator before slicing and serving.


Easter No-Bake Mini Cheesecake FAQs
Can I make no-bake cheesecake in advance?
Yes. Best of all, cheesecakes can be made ahead of time, which means you’ll have one less thing to worry about on the day of your party.
Cheesecakes can be covered and stored in the refrigerator for up to 3 days. Make a cheesecake ahead of time and freeze it for even more convenience.
Refrigerate whole cheesecakes overnight to defrost.
Are you on Facebook? I am too! Join me as I share everyday adventures with you. I will be sharing our travels, recipes, and crafts!
Can I store a warm cheesecake in the refrigerator?
No, Warm cheesecake should not be refrigerated immediately. As the inside temperature of the refrigerator rises, placing the hot cheesecake in the fridge will be more harmful to the refrigerator than to the cake.
It’s best to let the cheesecake cool completely before putting it in the fridge.


Is a watery cheesecake filling, okay?
No. One common issue with cheesecakes is that the cream cheese used adds too much moisture to the cake, causing it to become runny.
If you don’t add anything to help offset the cream cheese’s water content, the cake’s texture will most likely be off.
Can cheesecake quickly chill?
Yes. Use a small fan to blow horizontally over the cheesecake in the refrigerator (covered of course). As a result, the cool air will draw the heat away from the cheesecake.
It should reduce the cooling time by 30-40%, or about 4 hours on a 12-hour chill time.
Is it safe to put a cheesecake in the freezer to set?
No. It may be tempting to remove your cheesecake from the oven and immediately place it in the freezer to save a few steps.
It will not, however, set, and the consistency will be off. Allow your cheesecake to cool at room temperature after baking.
Then put it in the fridge until it’s set.


Other No-Bake Cheesecake Recipes You’ll Love
This dessert is so easy to make, and a great alternative to the traditional cheesecake for those who struggle with baking them.
It is so full of flavor and just enough sweetness to share with those you love.
Be Creative: Easter wouldn’t be the same without this show-stopping cheesecake. Serve it to family and friends.
You can try these fun and fascinating recipes in addition to Easter No-Bake Mini Cheesecake:
- Valentine’s Day No-Bake Cheesecake
- No-Bake Reindeer Cheesecake
- Red, White, and Blue Patriotic Mini Cheesecakes
Easter is right around the corner and that means it’s time to start thinking about what delicious treats you’ll be serving up at your celebration!
These no-bake mini cheesecakes are perfect for any occasion. They’re fluffy, creamy, and absolutely delicious, plus, they’re so easy to make!
If you’re looking for a fun and festive dessert that everyone will love, give these mini cheesecakes a try!


Easter No-Bake Mini Cheesecake
Easter No-Bake Mini Cheesecake

Easter is around the corner and that means lots of delicious food! This fun and colorful Easter no-bake mini cheesecakes are perfect for any celebration. They're fluffy, creamy, and absolutely delicious. Plus, they're so easy to make you'll have them whipped up in no time!
Ingredients
- FOR THE CRUST
- 1 sleeve of Graham crackers - crushed in the blender
- 1/2 stick of butter - melted
- 1 heaping Tablespoon of sugar
- CHEESECAKE:
- 4 - 8 ounce packages of cream cheese - softened
- 1 cup of powdered sugar
- 1 Tablespoon of Vanilla
- 1 teaspoon of lemon juice
- 1/2 of a 3 ounce package of Cheesecake flavored Instant pudding mix
- 1/2 cup of half n half - plus 2 Tablespoons - see instructions
- 1 can of Buttercream Frosting - for topping
- 1 package of Cadbury mini eggs
- Easter Nonpareils - to sprinkle
Instructions
- Measure the Copper mats, and cut them into 3 inch high strips.
- Fold the strips to meet ends, until you have about a 3 inch, diameter (across) circle.
- Cut the strip where needed, and leave enough extra to tape the ends of the strip together.
- Tape the ends of the strip with duct tape, and make sure it's taped securely along the edges.
- Place the copper circles on a piece of parchment paper, on a cookie sheet.
- Mix the Graham cracker crumbs, melted butter, and sugar together in a separate bowl, and place an equal amount in each copper circle.
- Tap the crumbs down with the end of a wooden spoon, until they're even and compact in the bottom of the copper circle.
- Place in the freezer.
- In the mixing bowl of a stand mixer, mix the softened cream cheese until smooth and creamy.
- Stop the mixer and scrape down the bowl, and mix again.
- Add the vanilla, and lemon juice, and mix.
- In a separate bowl, add half of the 3-ounce package of Instant cheesecake flavored pudding, and 1/2 a cup of half n half, and mix with a whisk until the pudding is smooth, and no longer grainy.
- Add the additional 2 Tablespoons as needed, to make the pudding smooth. When the pudding is smooth and thick, add it to the mixing bowl, and blend until completely smooth with the cream cheese.
- Add the powdered sugar a little at a time, and blend well after each addition. Scrape down the mixing bowl, and blend again.
- Divide the cheesecake batter evenly between 4 small bowls.
- In one bowl, add a drop of Aqua food coloring gel, and stir. In the next bowl, add a drop of pink food coloring gel, and stir.
- In the next bowl, add a drop of Neon lime green food coloring gel, and stir - you may need to add another drop of the lime green to get the color in the photo.
- In the last bowl, add a drop of purple food coloring gel, and stir.
- Depending on what brand of food coloring gel you use, you may need to add a little more or less than one full drop to achieve the pastel color desired. We used Great Value food coloring Gel from Walmart.
- Remove the Graham cracker crumbs from the freezer, add an equal amount of the Aqua-colored cheesecake on top of the Graham cracker crumbs, and place back in the freezer.
- Wait 30 minutes, take the cheesecakes out of the freezer, and add an equal amount of Pink cheesecake on top of the Aqua.
- Place the cheesecakes back in the freezer for 30 minutes, and then take them out and add an equal amount of the lime green cheesecake on top of the Pink.
- Place the cheesecakes back in the freezer, and after 30 minutes, remove them, and add the Purple cheesecake on top of the lime green cheesecake in equal amounts.
- Smooth the tops, and place back in the freezer until time to serve.
- When ready to serve, remove the tape from the copper circles, and remove the copper circles from the cheesecakes, leaving the cheesecakes on the parchment-lined cookie sheet.
- Add a swirl of frosting on top of the cheesecakes, and sprinkle with the Easter Nonpareils. Place three of the mini eggs on the Frosting. Serve and Enjoy!
- Makes 6 - 3 inch mini cheesecakes
Notes
If you want to remove the copper circles and decorate the cheesecakes ahead of time, simply place them back in the freezer until time to serve.
When adding the different colors of cheesecake to the copper circles, smooth the cheesecake batter out as much as possible to the edge of the circle, all the way around, so that you have smooth layers when the copper circles are removed.
ALSO: The copper mats used to form the circles will not stick to the cheesecakes. They are copper grill mats, but we found them to be a good tool for mini cheesecakes.
If you have Pastry molds or stainless steel plating rings, you can use those instead.
When you cut the copper mats to form the circles, or rings to form the cheesecakes, you may have pieces that you'll need to tape together to make another circle.
Nutrition Information:
Yield:
6Serving Size:
1Amount Per Serving: Calories: 813Total Fat: 67gSaturated Fat: 40gTrans Fat: 0gUnsaturated Fat: 21gCholesterol: 188mgSodium: 659mgCarbohydrates: 44gFiber: 0gSugar: 35gProtein: 12g
Nutritional information is automatically calculated with ingredients and serving size and may not be accurate. Please always double check with your own nutritional apps as well.
WHAT’S NEXT?
Please return and share your thoughts and experiences with me on how your Colorful and Fluffy Easter No-Bake Mini Cheesecake turned out and let me know how you enjoyed it!
If you get a chance to try it, let us know! Leave us a comment below, or share it with a picture on Instagram or Facebook! Don’t forget to tag us @kelly_reci_ and use the hashtag #Kellysthoughtsonthings so we can see what amazing meals you are cooking up!
Beth Ann
Friday 11th of March 2022
These are SO beautiful! Not only are they eye catching, but they also look like you spent hours on them. Or years in culinary school. I bet these have such a wow factor when you bring them to parties!
Kelly R
Friday 11th of March 2022
Hi Beth Ann, These are really easy to make, believe me, I did not go to culinary school.LOL Everyone loves them. :)